Cross-Network Integration (Open AMT)
Manage iAMT Devices with Open AMT and Configure into DeviceOn
The Open Active Management Technology Cloud Toolkit (Open AMT Cloud Toolkit) is an open-source initiative that provides modular microservices and libraries for the incorporation of Intel® Active Management Technology (Intel® AMT) into existing systems. This toolkit simplifies the adoption, integration, and customization of Out-of-Band Management (OOB Management) solutions for Intel vPro® Platforms, making it more accessible for IT departments and independent software vendors (ISVs) to enhance their OOB Management capabilities.
The DeviceOn was closely integrated with Intel AMT, which a limitation by not supporting cross network environments, especially when servers were deployed in public clouds. This challenge is addressed through the integration with Open AMT. After configuring an AMT device, it initiates an outbound connection to the Open AMT server. DeviceOn then facilitates the communication with Open AMT, enabling comprehensive out-of-band (OOB) device management across different networks.
Environment Checking
Before working the SOP, you must meet the following prerequisites:
Completed the setup of Open AMT portal and check it is available.
Hardware
A development system
At least one Intel vPro® Platform
Development System Software
Configuring AMT Devices with Open AMT and DeviceOn Server
This guide provides step-by-step instructions on how to configure your Active Management Technology (AMT) devices by integrating them with Open AMT and subsequently, with the DeviceOn server. We'll be covering the following key areas:
Retrieving the GUID of Your AMT Devices
Understanding how to obtain the Global Unique Identifier (GUID) for each of your AMT-enabled devices is crucial. This identifier is essential for the configuration and management process in the Open AMT and DeviceOn platforms.
Configuring Your Devices on the DeviceOn Server
Once you have the GUID, the next step involves setting up your devices within the DeviceOn server’s portal. This involves registering your devices, applying necessary configurations, and ensuring they are ready for remote management and operations.
By following this guide, you'll be equipped to efficiently manage your AMT devices using both Open AMT and DeviceOn server capabilities.
Retrieving the GUID of Your AMT Devices
In the session, you will learn how to connect your AMT devices to you own Open AMT server.
Login to Web UI of Open AMT
Open any modern web browser and navigate to the following link.
https://<Development-IP-Address>Log in to the web portal with the login credentials set for the environment variables
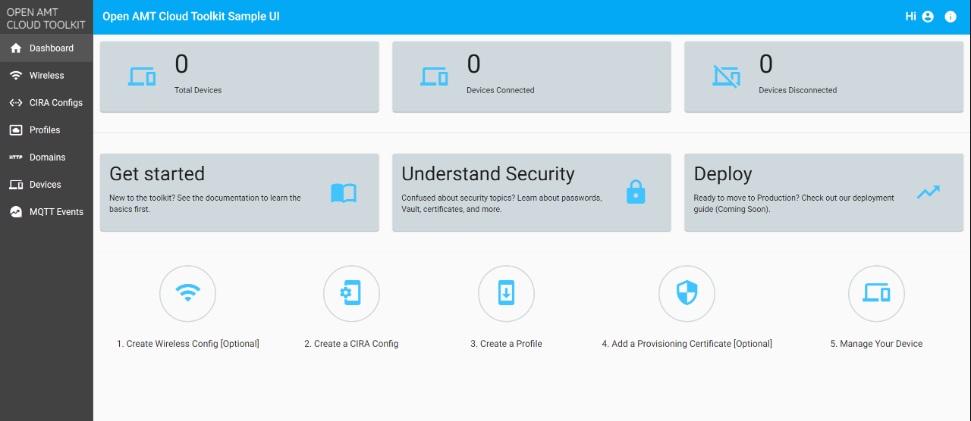
MPS_WEB_ADMIN_USERandMPS_WEB_ADMIN_PASSWORDin the.envfile.If anything goes well, the home page is shown below picture.
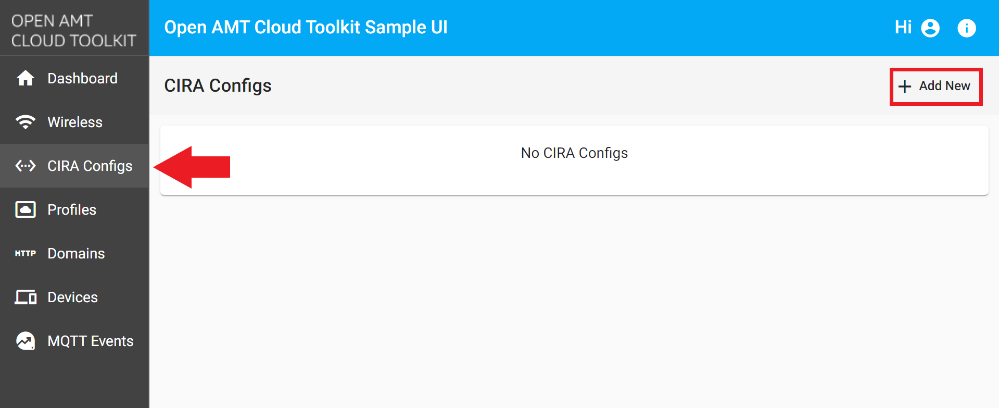
Select the CIRA Configs tab from the left-hand menu.
In the top-right corner, click Add New.
Specify a Config Name of your choice.
Select IPv4.
For MPS Address, provide your development system’s IP Address.
Cert Common Name (CN=) should auto-populate. If not, provide your development system’s IP Address.
Leave Port as the default, 4433.
Leave the Username as admin or choose your own.
Click Save.

Create a Profile with CCM
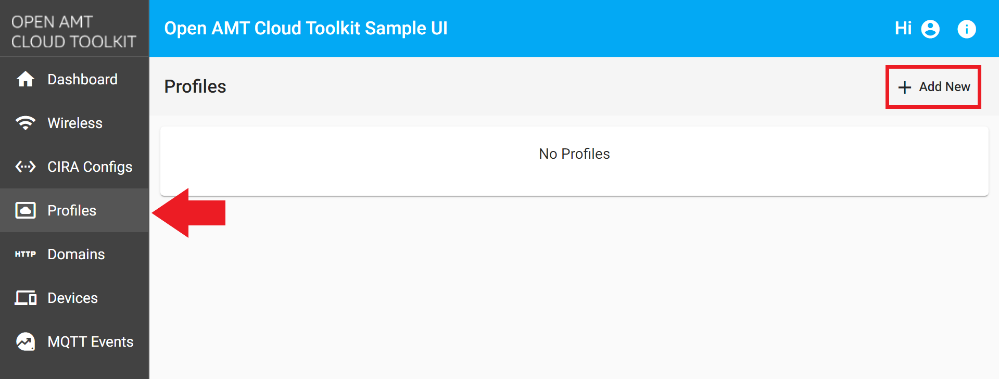
Select the Profiles tab from the menu on the left.
Under the Profiles tab, click New in the top-right corner to create a profile.
Specify a Profile Name of your choice.
Under Activation Mode, select Client Control Mode from the dropdown menu.
Enable desired redirection features for the profile under AMT Features - Enable/Disable features.
Provide or generate a strong AMT Password. AMT will verify this password when receiving a command from a MPS server. This password is also required for device deactivation.
The MEBX Password field is disabled. The password for Intel® Manageability Engine BIOS Extensions (Intel® MEBX) cannot be set when activating in CCM due to the lower level of trust when compared to ACM.
Leave DHCP as the default for Network Configuration.
Optionally, add Tags to help in organizing and querying devices as your list of managed devices grow.
Select CIRA(Cloud) for Connection Configuration.
Select the name of the CIRA Configuration you created previously from the drop-down menu.
Click Save.

Build the RPC
Only clone the
rpc-gorepository:git clone https://github.com/open-amt-cloud-toolkit/rpc-go --branch v2.5.0Change to the
rpc-godirectory of therpc-gorepository.Open a Powershell/Command Prompt as Administrator (Windows):
go build -o rpc.exe ./cmd/main.goConfirm a successful build:
.\rpc version
Unconfigure ME and reset the password of ME
Unconfigure ME and reset the password of ME
Restart your AMT device and enter BIOS.
Find AMT Configuration and click Enter.
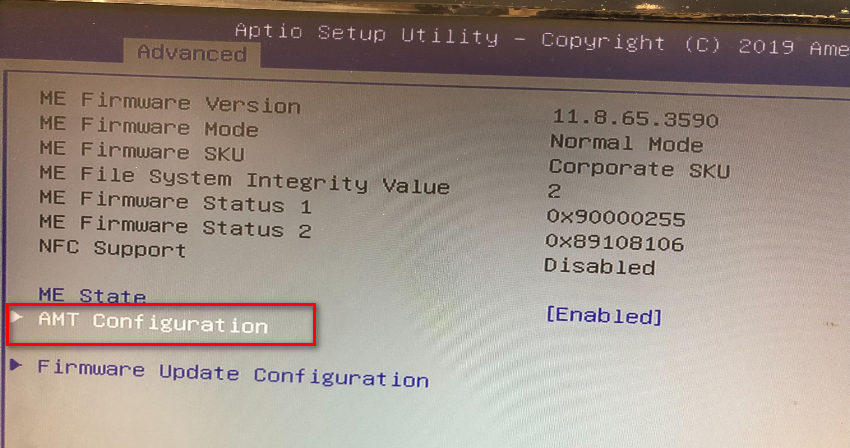
Enable the item named Unconfigure ME.
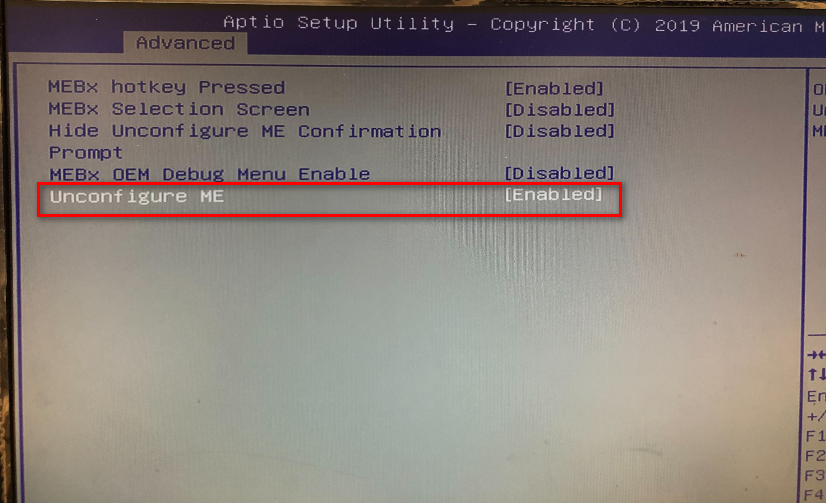
Save the changes and reset the password of ME.
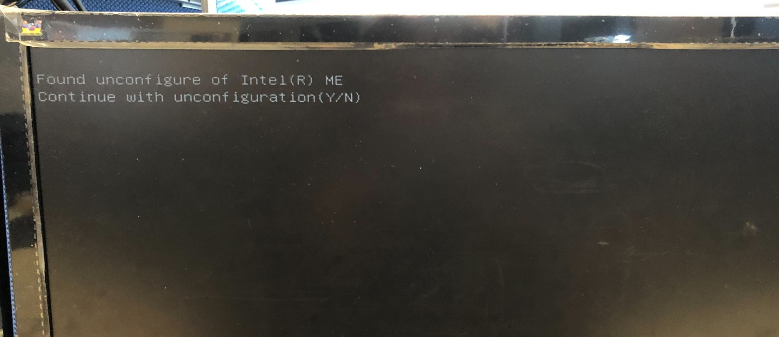
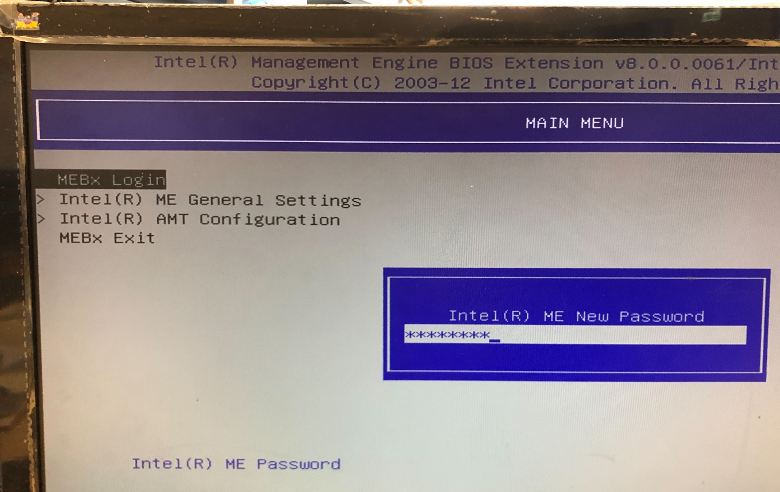
Run RPC to Activate and Connect the AMT Device
Check the Control Mode if it is pre-provisioning state:
.\rpc amtinfo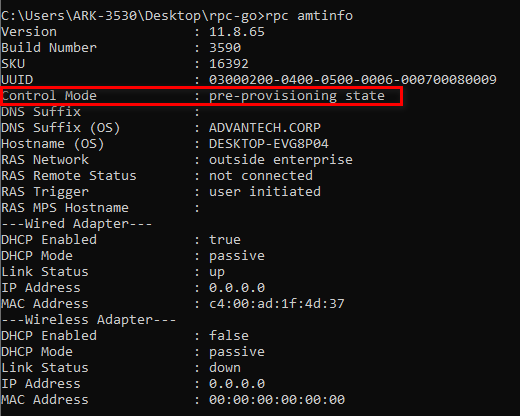
Select the Devices tab from the menu on the left.
Under the Devices tab, click New in the top-right corner to create a Device.
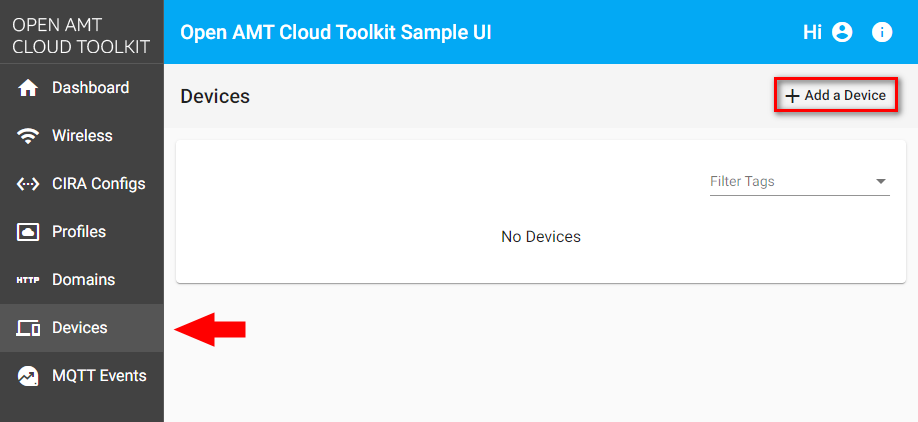
Under Choose Profile, choose the profile you created from the dropdown menu.
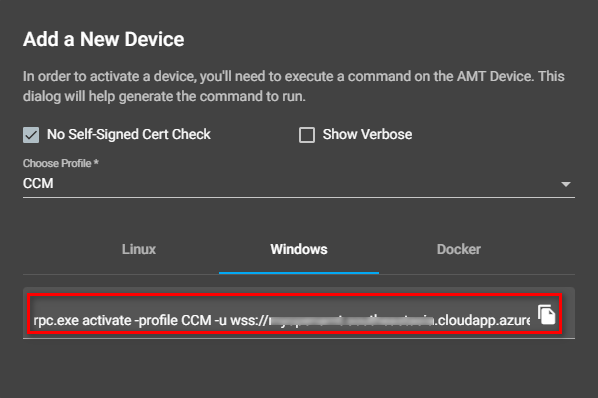
Copy and run the following cmd:

If anything goes well, your AMT device should appear under the Devices tab. You can get the GUID from the page.
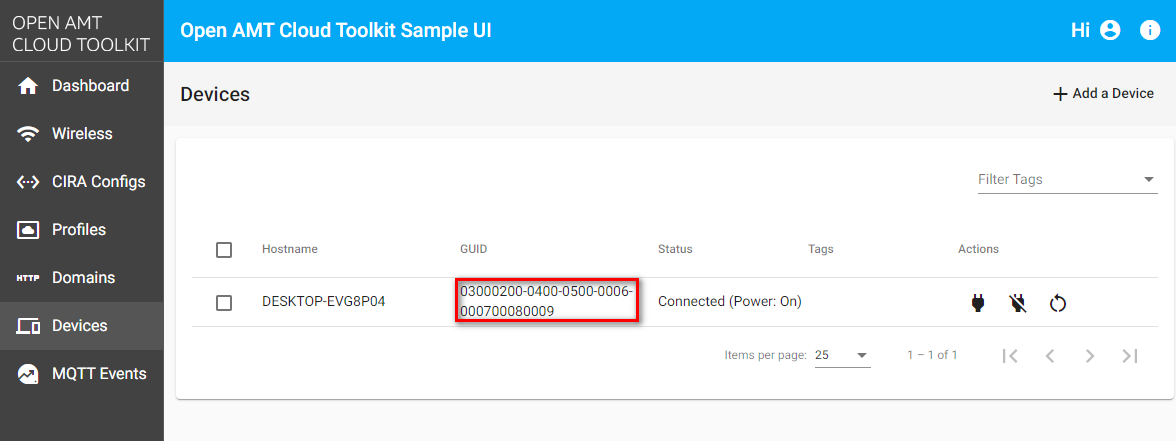
Configuring Your Devices on the DeviceOn Server
Login to Web UI of DeviceOn Server
Select the Settings -> System tab from the menu on the left.
Under the Settings → System tab, select System Settings and choose Open AMT from the dropdown menu in the bottom-right panel.

Enable the feature of Open AMT and specify the URL, username and password of Open AMT server.
Click Save.

Select the Device→List tab from the menu on the left.
Select the Device→List tab, click Edit Device from icon named MORE in the device which you want to map AMT device.
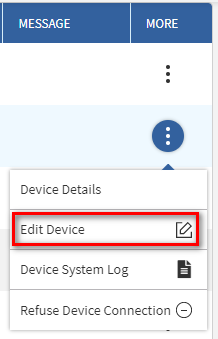
Specify the GUID of your AMT device.

Click Confirm.
If anything goes well, the icon of iAMT should enable. Click it, you can get the status and control the AMT device.


Last updated