Azure Kubernetes
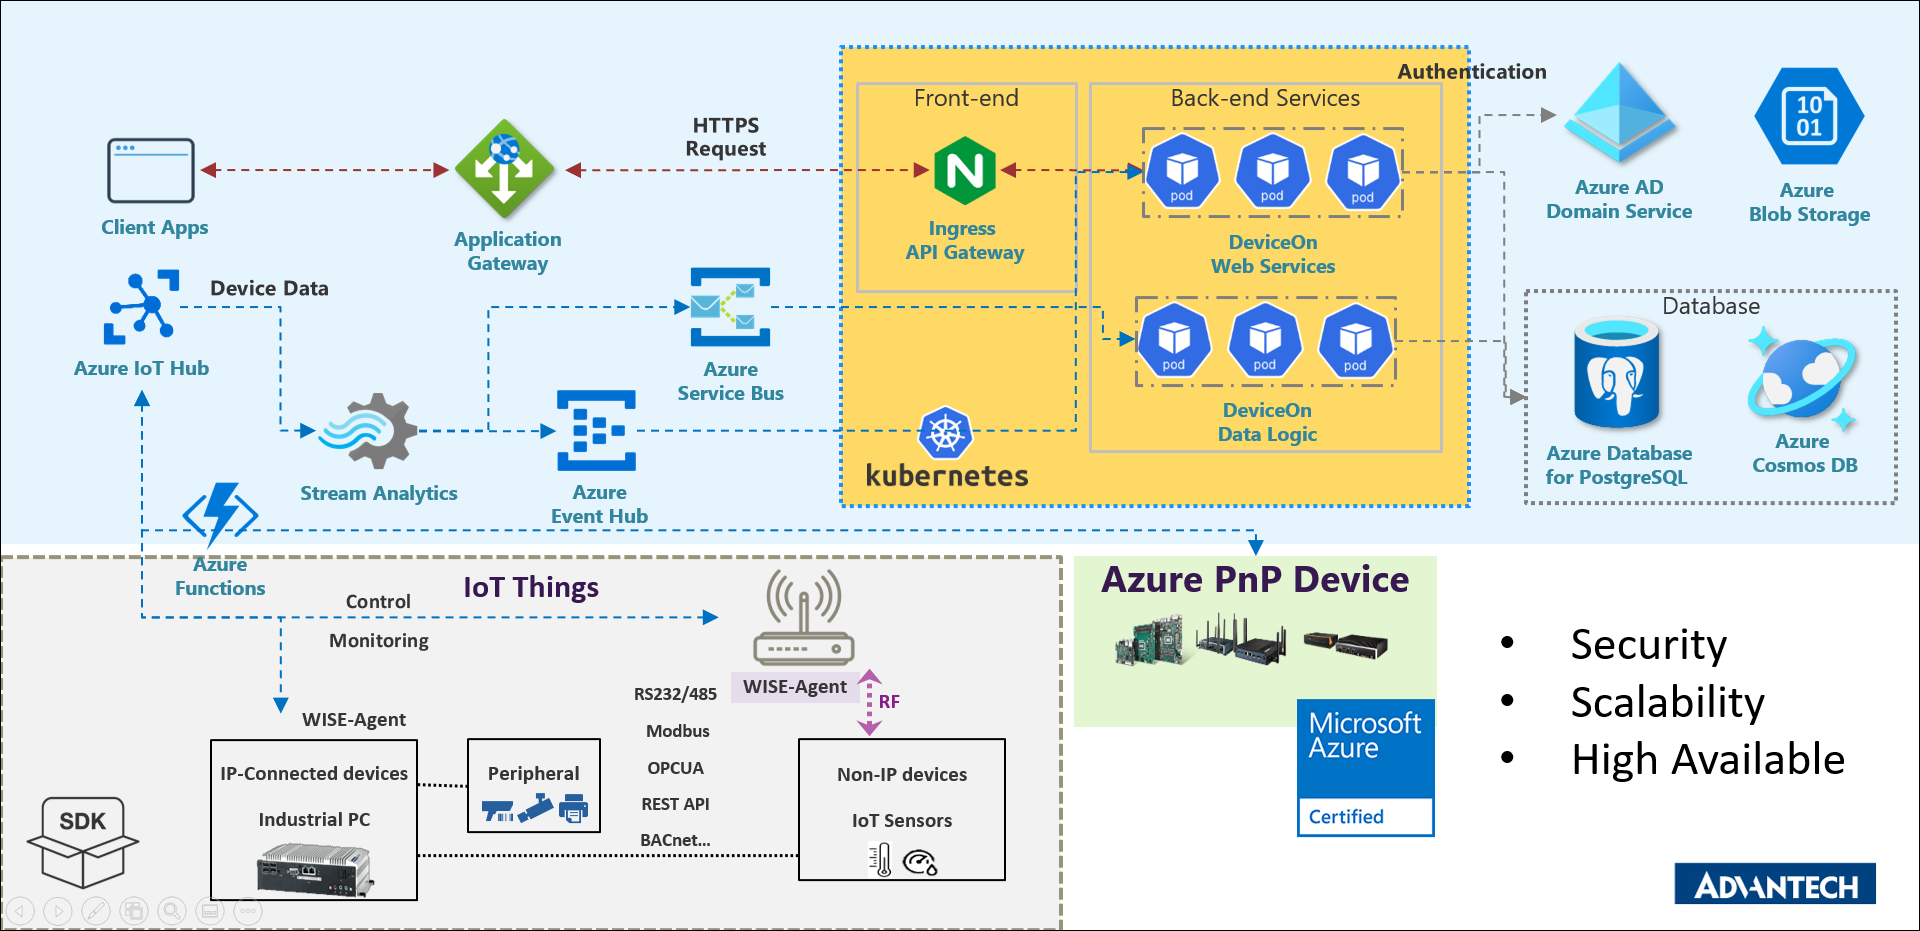
This document tries to describe, and guide you, how to deploy DeviceOn on Azure cloud. The version is focused on Azure components to integrate to provide security, scalability and high availability.
Microsoft Azure provides lot’s of cloud services with security, scalability and high available. Based on Azure components, DeviceOn could focus on functionalities for device management and data acquisition. We fully integrate with below services:
Azure Application Gateway (WAF protection and traffic load balancer), Optional
Kubernetes (Container Management)
Azure AD (Authentication), Optional
Cosmos DB, Azure PostgreSQL (Database)
Azure Function, IoTHub (Secure Device Connection)
Stream Analytics, Event Hub, Service Bus (Message Bus and Filter)
When you build on Azure’s secure foundation, you accelerate your move to the cloud by achieving compliance more readily, allowing you to enable privacy-sensitive cloud scenarios, such as financial and health service, with confidence.
Prerequisites
To achieve the goal to deploy DeviceOn, some resources have to be acquired and preconditions must be met as well.
An active Azure subscription.
An Azure CLI installed on your laptop, please refer to Azure documentation to download and setup. The Azure CLI is available to install in Windows, macOS and Linux environments. It can also be run in a Docker container and Azure Cloud Shell.
Second option, if you don’t want to install Azure CLI, you can also adopt Azure Cloud Shell, please refer to Microsoft documentation.
Step 1: Obtain the following three parameters for deployment
Application ID
Password (Client Secrets)
Tenant ID
Sign into your Azure account through Azure CLI
Use any way you prefer to open a Command Prompt and enter

Note: If the CLI can open your default browser, it will do so and load a sign-in page. Otherwise, you need to open a browser page and follow the instructions on the command line to enter an authorization code after navigating to https://aka.ms/devicelogin in your browser. Sign in with your account credentials in the browser.
Select your Subscription
After you login, the terminal console will list all subscriptions, please select the subscription that you would like to deploy.
If you don’t know which subscriptions you have, you can use below command to list all the subscriptions, and determine whether the subscription has been selected according to isDefault.

Create a service principal
The last step to create a service principal and generate these parameters. (1. Application ID, 2. Password and 3. Tenant ID)

If you want to further limit the scope of service principle to resource group, please try to create the resource group, and then use the following command to limit.
Step 2: Deploy DeviceOn via Custom Template
Open the Azure Portal
This will open the Azure Portal (portal.azure.com) in your subscription and create the required resources.
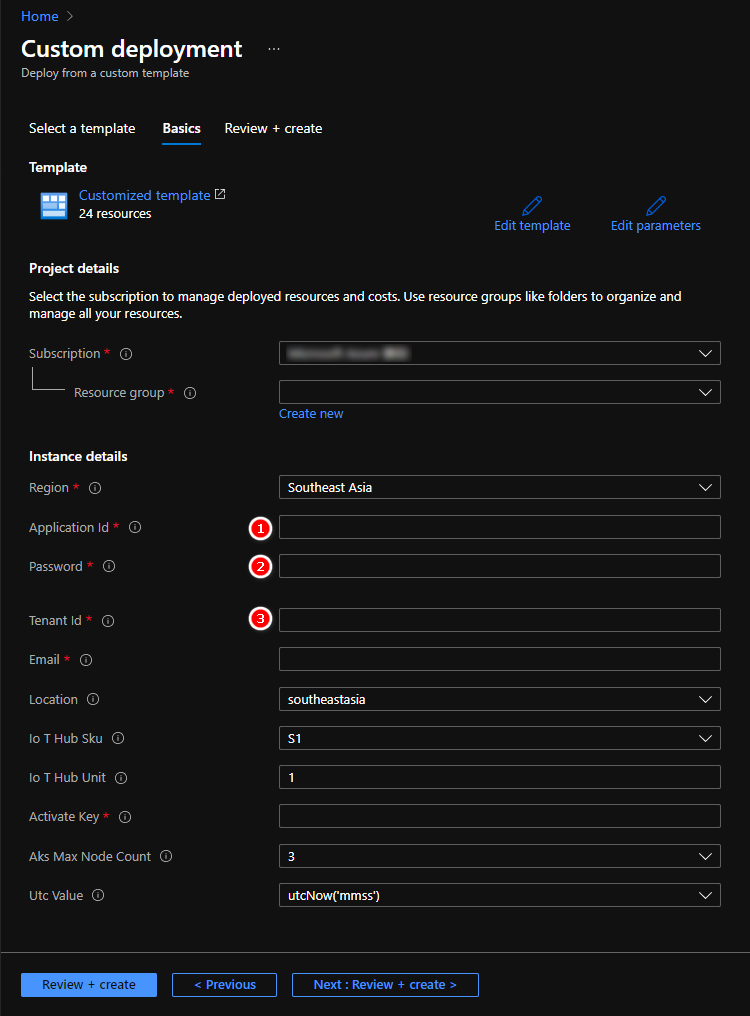
Enter the following values:
Resource Group
Select the resource group name you created in the last section.
Region
Select a location for the resource group. For example, Southeast Asia.
Application Id
The application Id is obtained from Step 1.
Password
The password is obtained from Step 1.
Tenant Id
The tenant Id is obtained from Step 1.
After deployment, the result/progress will be sent to this email
Location
Enter the location name according to the data center. for examle, Asia East(eastasia), Asia Southeast(southeastasia), Japan East(japaneast), US East(eastus), Europe North(northeurope)
IoTHub Sku
S1/S2/S3, the default is S1, you could adjust the tier from Azure Poral, if need.
IoTHub Unit
default is 1
Activate Key
Advantech hardware connection, enter N/A (free support for 1000 Advantech devices), or please contact us to purchase license key for Non-Advantech devices.
AKS Max Node Count
Maximum number of Kubernetes nodes to auto-scaling
Utc Value
Fix value for generating unique string
Select Review + create
Validation and start to create.

5. Deployment Process
The entire deployment process takes about 30 minutes. After completion, you will receive a mail notification. The content of the mail includes the DeviceOn web Service IP and login Account password.
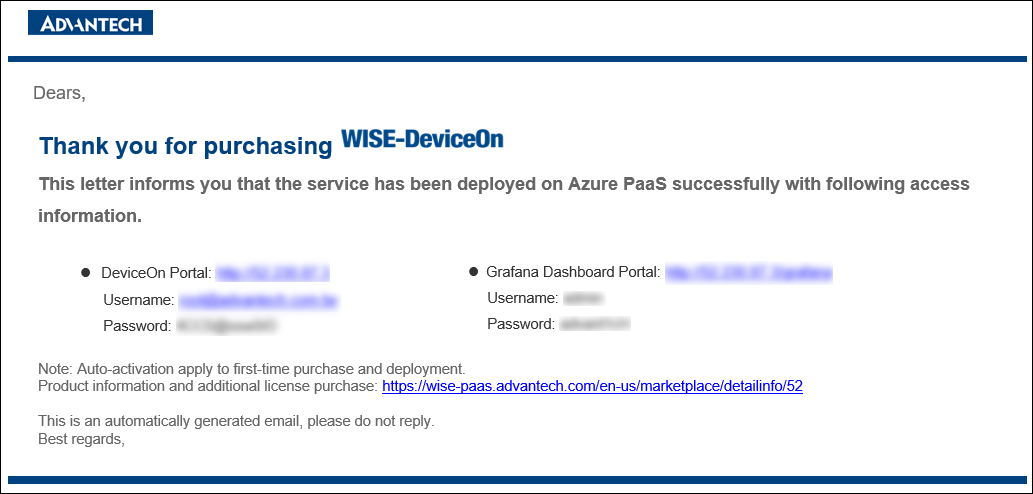
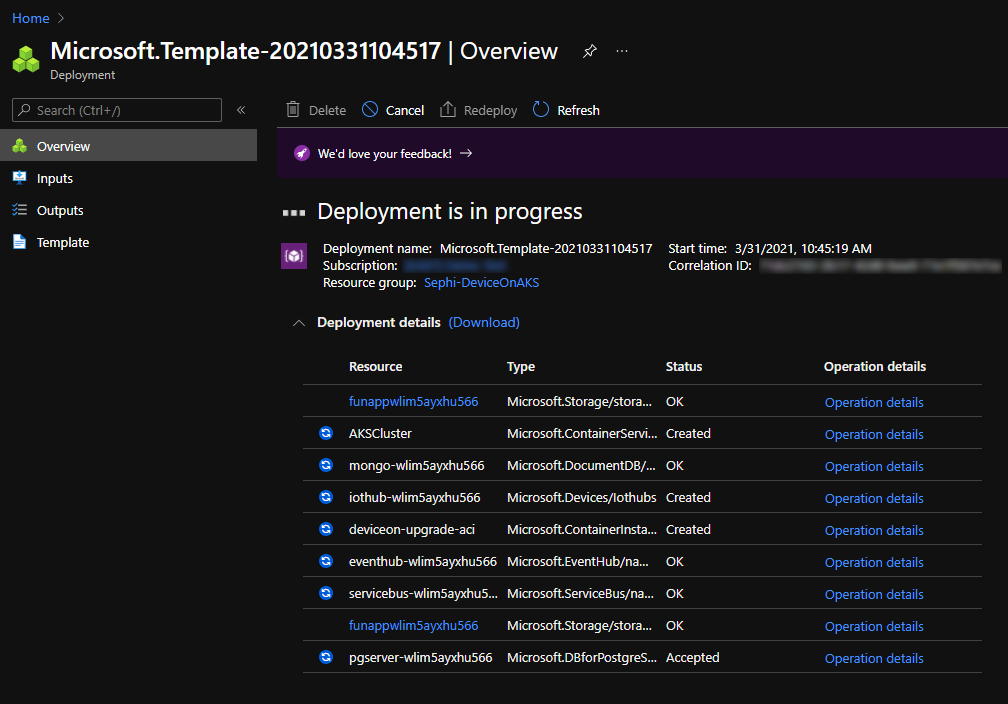
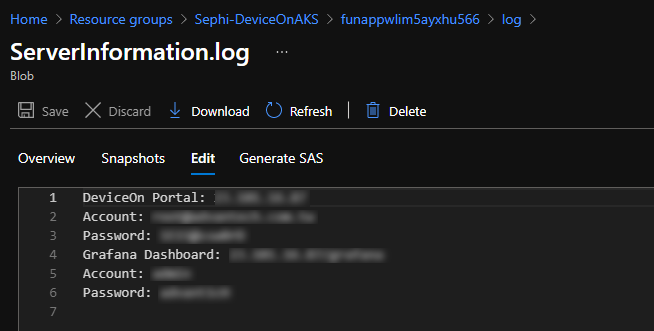
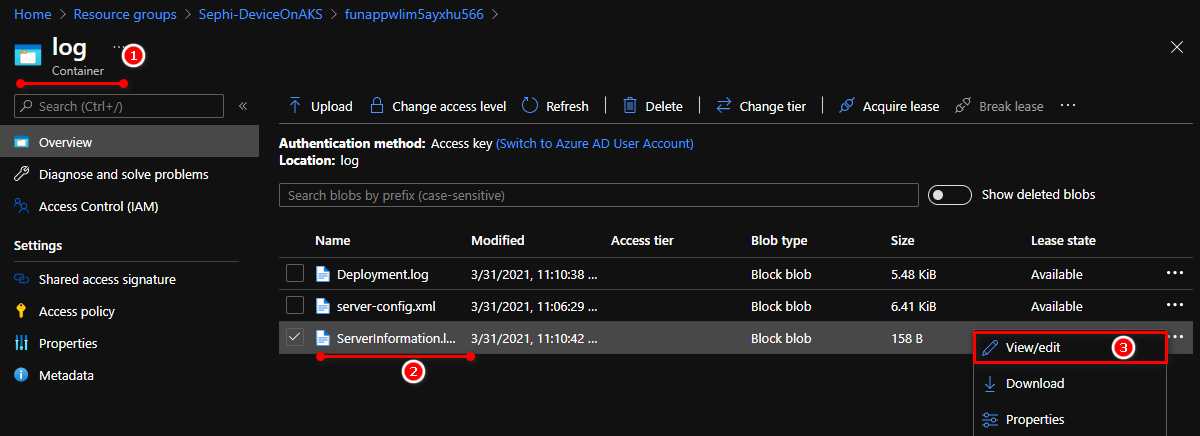
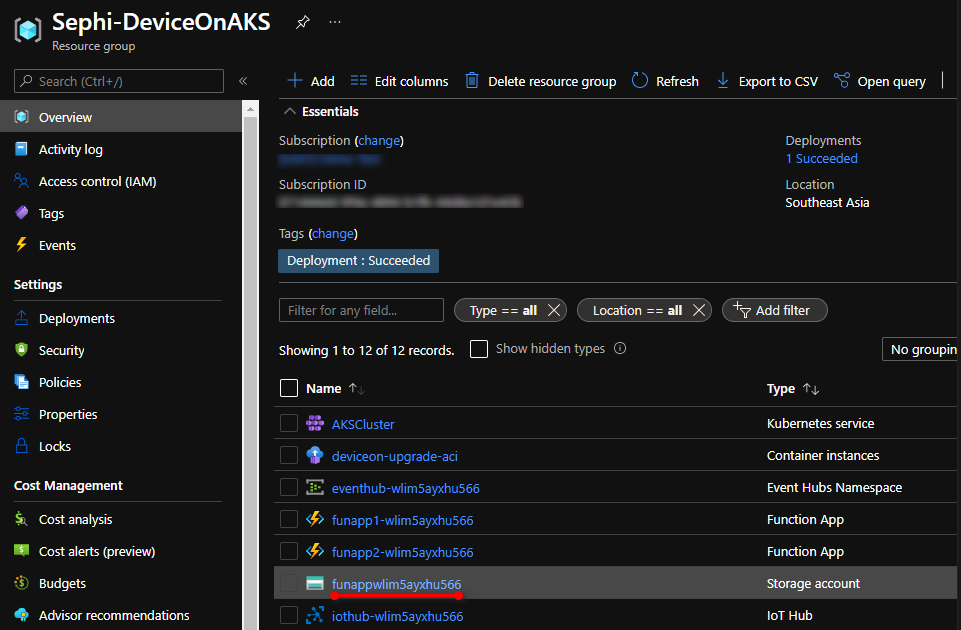
Assuming that your mail is intercepted/block or not received due to mail server filters, we will synchronously write this information to the Azure Blob Log container. Go to your resource group (you entered at the stage of deployment) storage account -> container -> Log -> ServerInformation.log. If the container has not been created, please wait a few minutes for initialization.
Result
There are two resource group generated on your subscription, one is you entered at the stage of deployment, which include the services such as: AKS, IoTHub, EventHub, Stream Analytics, CosmosDB, PostgreSQL…etc. Another resource group name prefix name starts with MC, that contains AKS VM node.
Last updated
